A novice's guide to breaking,
then repairing, and repairing...and repairing
a Matias USB 2.0 keyboard (for Mac)

As with so many of my misadventures, this one began with a wee dram of Scotch—admittedly, not the first wee dram.
HISTORY and REVIEW:
About 2 years ago, after a 50 years of procrastination, I decided to launch my career as a writer. I have since learned that this is not as auspicious a moment as one might think. I am both proud and a little depressed to say that I now count myself among the 10 million independent authors that clutter Amazon.com and the rest of the Cyber-sphere with desperate bids for attention.
Anyway, among the many things I mistakenly believed a good writer could not live without was an old-fashioned tactile keyboard. I had seen ads and favourable reviews in magazines for the Matias brand. They had the look I remembered from the 1990's and, I hoped, the feel, as well. I could not find a sample in a local shop, so I ordered blind, online.
I was very excited when it arrived and immediately set to pumping out the genius. I quickly became disenchanted. Though it is tactile, it seems unnecessarily noisy with the hollow clack of cheap plastic. Still, at more than $100, I was determined to give it the benefit of the doubt and I did eventually grow used to the feel, but never really felt that it was a good investment.
Beyond my dissatisfaction with the "feel" of the unit, there are three concrete things that bother me about this unit. The first is the location of the CAPS LOCK key in the lower right hand corner, beneath the SHIFT key, which I was previously used to being on the upper right hand side, near the TAB key.

The second thing is the extra thick connector cable which has two USB connectors at the end. One is to connect the keyboard, and the other is for the USB socket imbedded at the top of the keyboard. I don't need an extra USB socket and so the cable end just lay there, looking unsightly. And the extra thick cable was often unwieldy. The good thing about this problem is that it is easily solved with a pair of scissors. The connecting cable is actually two wires which are easily torn apart. After that, a quick pruning with a pair of scissors puts everything right. But make sure that you have correctly identified which cable is for the USB socket and which is for the keyboard. Snip the wrong one and you will have to suffer through a whole other repair article.
By far the largest inadequacy was the poorly crafted folding legs. The keyboard works well lying flat, but if you prefer a steeper angle, you can flip out a couple of plastic supports from the underside, raising the back end. The angle that produces is perfect for me so I used the legs, but they would not lock into place very well, and frustratingly collapsed many times a day—alas, poor, deprived readers, often during moments of peak genius. More frustrating still, there seems to be no easy fix without making a permanent alteration which then makes the keyboard unsuitable for use on your lap.
Other than that, it worked as advertised... until, of course I basted it in Scotch.
In my defence, nowhere in the instruction manual does it mention this unexpected vulnerability... I'm sure.
THE GREAT SCOTCH INCIDENT:
It was a Saturday night and the kids had just gone to bed. I finished paying bills and answering emails, then sighed in appreciation as I topped up my tiny Scotch-sipping glass and eased back into my desk chair to enjoy my savoured routine of Saturday evening of Scotch, popcorn and Netflix. (I have eclectic tastes.) Somehow, my baby finger grazed the edge of the cup and toppled it—which might have been a short cleanup and shorter story had my lightening reflexes not gotten involved. Like twin vipers, my hands streaked toward the falling object and fumbled it end over end, splattering the monitor and my clothes—the glass finally coming to rest atop the keyboard which greedily guzzled the majority of the sticky sweet liquid. I wept to see 12 year old, single malt ooze away between the seven and the eight.
Thinking quickly, I unplugged the keyboard, licked clean the tops of its keys and flipped it over to drain. Then I made a dash for a wet rag. After wiping down the monitor and giving myself a sponge bath, I took a deep breath and turned over the keyboard. It looked ok. I wiped away the last of the Scotch and tentatively plugged it back in. The computer went crazy—the screen flashed and it began shrieking, "All is lost! I am killed!" which I deemed a little over the top, but still, I felt the harsh sting of judgement.

I put the Matias keyboard to one side, got out my old Bluetooth spare, settled back into my chair and solemnly refilled my glass with exaggerated caution. It took more than half of Batman Drags On before I was able to completely forget the incident.

THE REPAIR:
At the time of the Great Scotch Incident, the keyboard was more than a year old and I was ready to ditch it in favour of the Apple expanded USB keyboard, but, still, it had cost me $100 and so I could not make myself throw it away without at least attempting a repair.
I will say at the outset that I have never before opened a keyboard and had no idea what to expect. All I knew was that it was currently completely useless and so I could not make the situation any worse, which are the two required parameters before I feel qualified to attempt any repair.
I know that ample online help exists. There are probably a dozen insightful and detailed Matias USB 2.0 Keyboard Repair blogs, each written by highly competent technicians and illustrated with high-res pictures and microscopic detail. But I am nothing if not bold, and no great adventure ever began "I diligently followed the directions..."
I ended up going back into the mechanism three times, before getting it right. But I did get there. And, I had an adventure!
Flipping the unit over, I observed eight screws on the backside: a line of four long ones along the back edge and four shorter ones across the middle. They were all inset a fair ways, so I needed a Phillips screwdriver with a longer bit to reach them, but they came out easily. Five interlocking tabs secure the front edge of the unit, and to open it, all I had to do was separate the back edge. Which I did. Subsequently, 107 small, rubber, nipple-like discs tumbled free, falling across our kitchen counter top and bouncing to the floor, headed for dark corners and tiny crannies. Be more prepared than I was and you won't have to waste a half hour collecting them all.
Inside, there was a small amount of circuitry firmly attached to the housing, two thin sheets of plastic with a printed maze of switch contacts, 107 empty circular indentations meant to house those 107 rubber discs, and the stems of the 107 key-tops which were minimally secured by tiny plastic tabs.
One hundred and seven! This reflects a depth of knowledge which can not be obtained by simply opening a unit and performing a repair which works the first time!

It was at this point that I made the keen, though awkwardly belated, observation that to clean spills from under the keys, I really didn't need to open the unit at all as the key-tops are all inset into deep plastic wells which had contained all the sticky syrup that had once been my precious Scotch. Without opening the unit, the key-tops pop right off for easy access to this area. That's the exact moment when I remembered having done that about 20 years ago to clean out spilled beer. I may have a drinking problem, but it is of a very curious variety.


Anyway, none of that mattered to me then as I now had a larger job before me and my wife was now buzzing around wanting to use the kitchen counter to make lunch for the kids in spite of the fact that they had already eaten, a mere four hours earlier. Wives are notorious for not conceding when furniture has been commandeered for a higher purpose.
Ignoring her and staring intently, I came to vaguely understand how the keys work: the plastic key-top presses down on a rubber nipple which in turn squeezes the two sheets of contacts together at that point. What I had missed while being distracted by 107 bouncing rubber nipples was exactly how they had been positioned. In order to save you two more trips into the device, I am now going to reveal that they sit, nipple-side-up, beneath the key-tops.


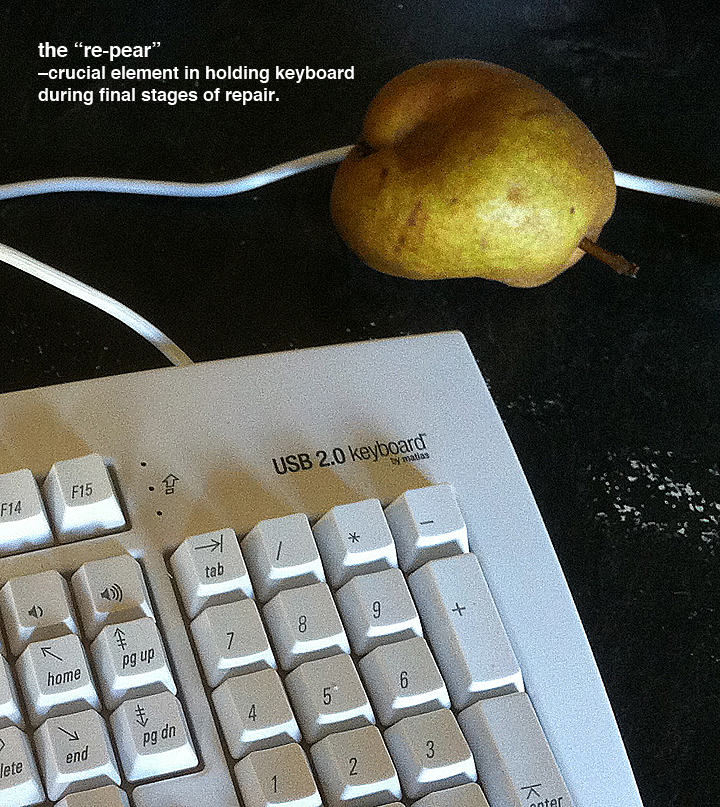
But wait there's more! The real secret to reinstalling the nipples is that the keyboard needs to be upside down and suspended, with the keys hanging loosely downward. If you lay the keyboard down on top of the keys and try to reinstall the nipples, they will not sink deeply enough into place to work well. Suspending the keyboard is a bit tricky as the unit has stylishly curved edges. I used a tupperware container filled with leftover stew at one end, and a rock hard, knobby old pear the kids had stolen from our neighbour's tree at the other. That worked for me, but I think you could safely substitute whatever happens to be on your wife's counter top, at the time of repair.
Reassembly was obvious: I interlocked the five front tabs and carefully clam shelled it closed, reinserted the screws—and voila!

My repair worked perfectly, third time!
And, I'm proud to be able to say that rather than simply throw away a malfunctioning Matias USB 2.0, I now have a perfectly working keyboard I hate.

_______________________________
Liked this article?
Here's more from William M. Dean...


No comments:
Post a Comment